What Is Minting?
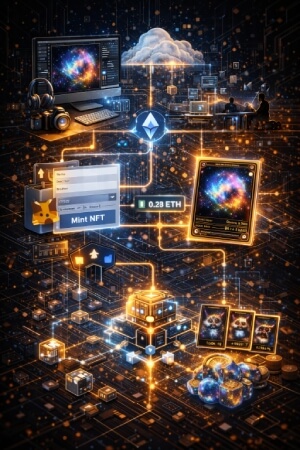
At its most basic level, minting is simply the process of creating an NFT. But there's a little more to it than that, so let's break it down properly.
Every NFT starts life as an ordinary digital file. That could be a JPEG image, an MP3 audio file, a short video clip, a GIF, a 3D model, or just about any digital file format you can think of. At this stage, it's just a regular file sitting on someone's computer, and there’s nothing special about it. Anyone could even have a copy of the same file, share it, screenshot it, or download it without any issue.
In fact, even after minting the file into an NFT, anyone can still right-click and save the image, take a screenshot, or share it online. In other words, the file itself can be reproduced endlessly. But that's actually beside the point, because the file is not what makes an NFT valuable or unique.
What minting does is take that ordinary digital file and attach to it something that cannot be copied or replicated, a verified, one-of-a-kind ownership record permanently written to a blockchain. This record contains a unique token ID for that specific NFT and no other.
In essence, an NFT is a unique digital token, permanently recorded on a blockchain, that represents verified ownership of a specific digital item. Minting is the process that brings that token into existence.
Now, let's break down that process step by step.
Step-by-Step Guide to NFT Minting
Earlier, I mentioned that, like cryptocurrency, NFTs are built on blockchain technology. However, there isn't just one blockchain. There are several, and each one operates a little differently in terms of cost, speed, and the kind of community built around it.
This is important because whichever blockchain you choose becomes the permanent home of your NFT. Once minted on a blockchain, you can't just move it to another one.
Choosing Your Blockchain
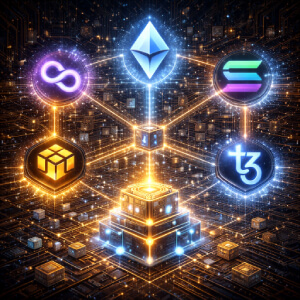
In simple terms, a blockchain is a decentralized digital ledger. It records transactions in a secure and transparent way. When you mint an NFT, the blockchain is what permanently stores the token’s data, including its unique ID and ownership record.
Some of the most popular blockchains include Ethereum, Solana, Polygon, Tezos, and Binance Smart Chain (BSC). Ethereum is the most widely used blockchain, and since it's the most established blockchain, it also has the largest community, the most marketplace support, and the strongest reputation for security. The downside, however, is cost. Ethereum's gas fees can be significantly high, especially during busy network periods.
Solana, on the other hand, is known for its low transaction costs. It’s also relatively faster when it comes to processing transactions.
The point is, each blockchain has its own peculiarities. Your choice should therefore depend on what you prioritize. If reputation, security, and maximum reach matter most, Ethereum is the standard. If you want lower costs and fast transactions, Solana or Polygon are strong alternatives.
Setting Up Your Wallet
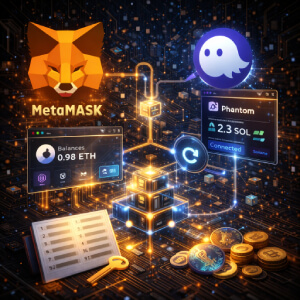
Once you've chosen your blockchain, the next thing you need is a crypto wallet, and your blockchain choice determines which wallet you'll be using.
A crypto wallet is your digital identity in the NFT world. It's what holds your NFTs, stores the crypto you'll use to pay for transactions, and connects you to marketplaces and minting platforms.
If you're minting on Ethereum or Polygon, MetaMask is the standard. It's a browser extension wallet that's widely supported across most major NFT marketplaces. If you're minting on Solana, Phantom is the go-to wallet. It is lightweight, easy to use, and built specifically for the Solana ecosystem.
To set up, you install the wallet app, create your wallet, and you're given a seed phrase, a series of words that acts as the master key to your wallet. This is arguably the most important thing in the entire process. Write it down, store it somewhere safe, and never share it with anyone, because if you lose it, you lose access to your wallet permanently.
Once your wallet is set up and funded with a little crypto to cover transaction costs, you're ready to move on to preparing what you actually want to mint.
Preparing Your Digital File
As mentioned earlier, NFTs can be created from almost any digital file. Whether it’s an image, GIF, or MP3, you must choose a digital file depending on what kind of NFT you're creating. Images, however, have been the most popular so far.
Here are some important factors to consider when choosing a digital file:
File Size
Every NFT marketplace has a maximum file size limit, and it varies by platform. So, you need to check the specific limits of whichever marketplace you're using before preparing your file, because uploading something that exceeds the limit will just get rejected.
Quality and Originality
Whatever file you upload should be your original work. Minting someone else's content as an NFT is unethical; it can get your listing taken down and your account flagged on most major platforms. Beyond originality, also make sure the file is of the highest quality possible.
File Storage
The responsibility of file storage does not lie with the NFT creator. It also does not lie on the blockchain.
While the blockchain records the token and ownership of an NFT, the actual digital file is usually too large to store directly on the blockchain itself. Instead, most platforms store the file on something called IPFS, which stands for InterPlanetary File System. IPFS is a decentralized storage network that gives your file a permanent, unique link that gets attached to your NFT's metadata.
Creating Your Metadata
An NFT's metadata is like its identity card. The metadata is essentially a set of data that describes and defines your NFT. It's the information that tells the blockchain, the marketplace, and potential buyers exactly what the NFT is, what it looks like, and what makes it unique.
To create your NFT’s metadata, here’s what you must do:
- You must give your NFT a title, which will appear on the marketplace listing and remain permanently attached to the token.
- You must provide a brief description of the NFT and what it represents.
- You must also assign specific traits and attributes to your NFT. These might include things like background color, outfit, accessories, or expression. Rarer traits typically make an NFT more valuable within its collection.
After all this is done, you can then proceed to upload your file along with the metadata. At this stage, you can, as the creator, also add a royalty clause to the NFT. This specifies what percentage you want to receive every time the NFT is resold in the future.
Now, after uploading your file and all the required data, here’s what the blockchain and smart contract actually do automatically behind the scenes:
- The smart contract assigns a completely unique token ID to the NFT. This is what distinguishes it from every other token on the blockchain.
- The smart contract's own address on the blockchain is attached to the NFT.
- The blockchain records the wallet address of the person who minted the NFT.
- The exact date and time of minting is permanently recorded to create an unalterable proof of when the NFT came into existence.
All of the above then gets bundled together, confirmed by the network's validators, and written permanently onto the blockchain ledger where it cannot be altered or deleted. The end result is a fully formed NFT with a verified identity, a permanent record of its origin, and all the information a buyer needs to understand exactly what they're purchasing.
Choosing a Marketplace and Minting
The final step in this creation process is choosing which marketplace to mint your NFT. An NFT marketplace is the platform where your NFTs will be created, listed, discovered, sold, and bought. The platform is like a bridge between you, the NFT creator, and collectors seeking to buy your NFT.
Just like with blockchains, there are several marketplace options available to creators. OpenSea is the largest and most well-known NFT marketplace. It supports both Ethereum and Polygon. It's also beginner-friendly, widely recognized, and gives creators access to the largest pool of potential buyers.
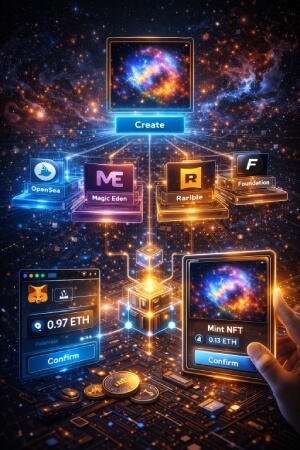
Magic Eden is another marketplace. It is, in fact, the leading marketplace for Solana-based NFTs. There’s also Rarible, which supports multiple blockchains and Foundation, which is more selective and community-curated, among others.
Now, your blockchain choice will largely narrow down your marketplace options automatically. If you minted on Solana, you're heading to Magic Eden. If you're on Ethereum or Polygon, OpenSea is the natural starting point. This means you must have considered your marketplace preference when choosing a blockchain in the first place.
Here's exactly what you do on the NFT marketplace to finally mint your NFT:
- Visit the marketplace and connect your crypto wallet
- Navigate to the "Create" or "Mint" section of the platform
- Upload your digital file
- Fill in your metadata (name, description, traits, and royalty percentage)
- Choose whether to mint on a specific blockchain if the platform supports multiple
- Click mint, and the marketplace sends a transaction request to the blockchain
- A pop-up appears in your wallet asking you to confirm and sign the transaction
- You approve it, the transaction is submitted to the network, validators confirm it, and your NFT is officially recorded on the blockchain
The whole thing can take anywhere from a few seconds to a few minutes, depending on how busy the network is at that moment.
It is, however, important to know that minting is not free. Depending on the blockchain you're on and the marketplace you're using, you will likely need to pay a gas fee to cover the cost of processing and recording the transaction on the blockchain.
Some marketplaces also charge their own minting fee on top of that. This is why having a small amount of crypto in your wallet before you start the process is essential.
Smart Contracts: What's Happening Behind the Scenes When You Hit Mint
A smart contract is a self-executing program stored on the blockchain. It contains a set of rules written in code that it automatically executes whenever certain conditions are met.
When you mint an NFT, the marketplace deploys a smart contract on your behalf. This contract is what actually creates your token.
It's the smart contract that generates the unique token ID, records your wallet address as the creator, stores the metadata, encodes your royalty percentage, and writes everything permanently onto the blockchain. Every rule governing your NFT, who owns it, what royalties are owed on resale, and how ownership transfers lives inside that contract.
What makes smart contracts particularly powerful is that once they're deployed, they cannot be altered. The terms are locked in permanently.
Direct Minting vs. Lazy Minting
There's actually more than one way to approach NFT minting, namely, direct minting and lazy minting.
Direct Minting
Direct minting is the traditional approach and, as the name implies, it’s direct. In this approach, the NFT is minted immediately. This means that the moment you complete the process and approve the wallet transaction, your NFT is recorded on the blockchain right away. It exists on-chain from that very moment, whether or not anyone ever buys it.
The significance of this is that the NFT is fully verified and publicly visible on the blockchain from day one. For buyers, this is reassuring. They can see the token's full history, confirm its authenticity, and trust that what they're purchasing is already a legitimate, recorded asset.
The tradeoff, however, is cost. Because the NFT is written to the blockchain immediately, the creator pays the gas fee upfront, before a single sale is made. So if you mint a collection of 500 NFTs and only sell 50 of them, you've still paid the minting cost for all 500. On a network like Ethereum, that can add up to a significant amount of money.
Lazy Minting
Lazy minting follows a different approach. Instead of recording the NFT on the blockchain immediately, the creation is essentially deferred. The NFT exists off-chain, meaning it's prepared and listed on the marketplace, visible to potential buyers, but it hasn't actually been written to the blockchain yet.
The minting only happens at the moment someone buys it. When a buyer purchases a lazily minted NFT, that's when the transaction hits the blockchain, the token is officially created, and ownership is transferred. And in most cases, the gas fee is passed on to the buyer rather than paid upfront by the creator.
The Simple Path to Minting NFTs
Anyone can actually create an NFT. And while the process may seem lengthy on paper, in practice, once everything is set up, it can all come together in a matter of minutes.
So what would you actually need to get started? Well, as I’ve shown in this article, you would need a digital file, a crypto wallet, an account on an NFT marketplace, and a small amount of crypto to cover gas and marketplace fees. And if you don’t have enough to cover the gas fee, lazy minting is always an option.